Athena Perimeter Generator
In Greek mythology, Arachne wove adaptive tapestries that shifted to fit every shape. Athena's were exact. We forked Arachne's code and rebuilt it around fixed extrusion widths and independent overlap control, which resulted in something familiar but completely different.
Arachne calculates overlap automatically. Athena lets you specify exactly how much perimeters overlap, including negative overlap for creating gaps between perimeters. This is especially useful for flexible materials where controlling the gap between perimeters is critical. No other perimeter generator offers this level of control.
Athena vs. Arachne
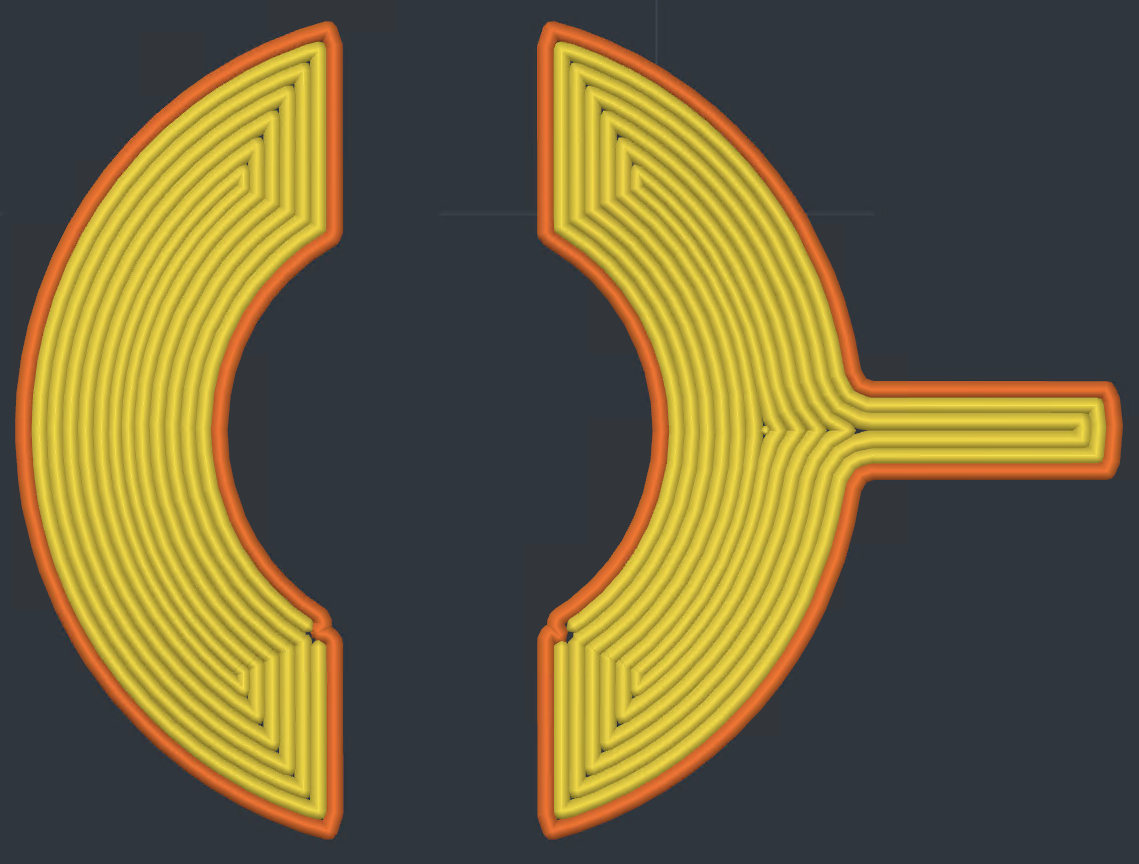
Athena
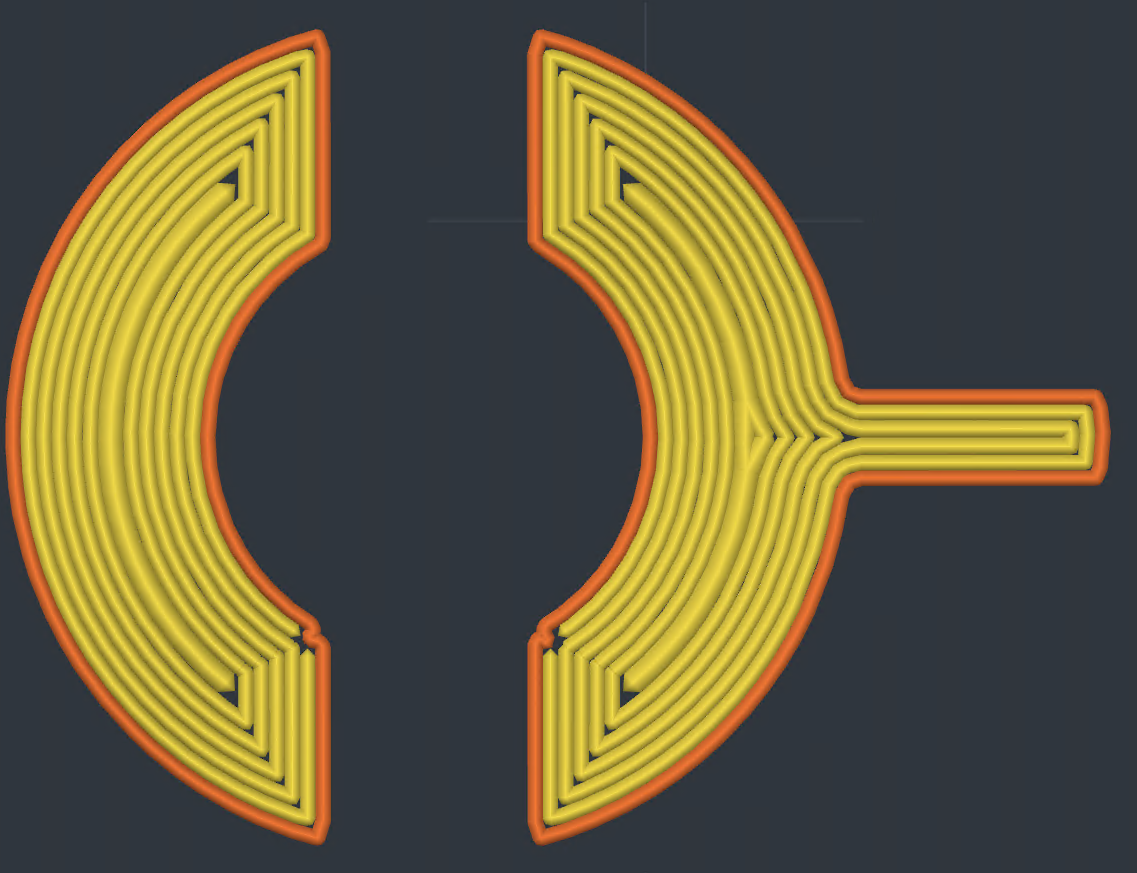
Arachne
Settings
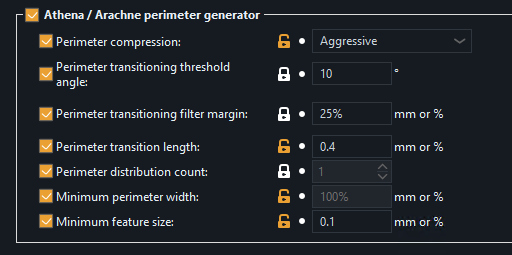
Perimeter compression
When perimeters don't quite fill a wall evenly, there's leftover space between them. Athena can squeeze a narrower bead into that space rather than leaving it empty. This setting controls how thin that center bead is allowed to get. Disabled means center beads must be full width, leaving more gaps. Moderate allows them to narrow to 66%. Aggressive goes to 33%. There's a hard floor at 33% of nozzle diameter so nothing gets too thin to actually extrude.
Thin wall width precision
When a wall is thinner than one full perimeter, Athena prints it as a single bead matched to the actual wall thickness. This setting controls the rounding grid for that width. Finer values (0.001mm) track tapered walls more faithfully as they narrow or widen. Coarser values (0.1mm) smooth out the micro-variations that mesh triangulation introduces, producing a more uniform bead on walls that are supposed to be constant thickness. Normal perimeters are not affected. They always use your configured extrusion width exactly.
Maximum perimeter width
When a wall is wider than one nozzle width but narrower than two, Athena has to decide: stretch a single bead to fill it, or split into two. This setting defines how far a single bead is allowed to stretch before Athena splits it into a pair. Expressed as a percentage of nozzle diameter. The default 150% means a bead can grow up to 1.5x nozzle width before a split is forced. Lower values produce two-bead walls sooner. Higher values tolerate wider single beads.
Minimum feature size
The thinnest wall that will produce a toolpath. Features thinner than this are skipped entirely. Accepts mm or a percentage of nozzle diameter (default 25%).
Perimeter transition angle
Controls when transitions between even and odd numbers of perimeters are created. Wedge shapes with an angle greater than this setting skip the transition, leaving the center unfilled. Reducing this value reduces center perimeters but may leave gaps or overextrude.
Perimeter transition filter margin
Prevents rapid back-and-forth transitions between one extra perimeter and one less. Increasing this margin reduces transitions, which means fewer extrusion starts/stops and less travel, but large width variation can cause under- or overextrusion. Accepts mm or a percentage of nozzle diameter.
Perimeter transition length
How much space is used to split or join perimeter segments when the part becomes thinner and the perimeter count changes. Accepts mm or a percentage of nozzle diameter.
Overlap Control
Two independent overlap settings control how perimeters bond to each other. The default 10.73% for both is derived from the geometric constant (1 - π/4) / 2, which accounts for the semicircular bead cross-section. Negative values create gaps instead of overlaps.
External perimeter/perimeter overlap
Controls overlap between the external perimeter and the first inner perimeter.
Perimeter/perimeter overlap
Controls overlap between all internal perimeters.